What follows is an apparently unending pattern of getting up, opening the entryway, plunking down then doing everything over again to allow them to move in. Put that on steady rehash for the duration of the day and it gets a bit tiring. A canine entryway can help end this endless loop before it even starts. Rather than dropping a huge load of cash on one at the store, here’s a fast bit by bit manual for making your own Ifetch Too.
Stage 1: Measure Your Dog Door
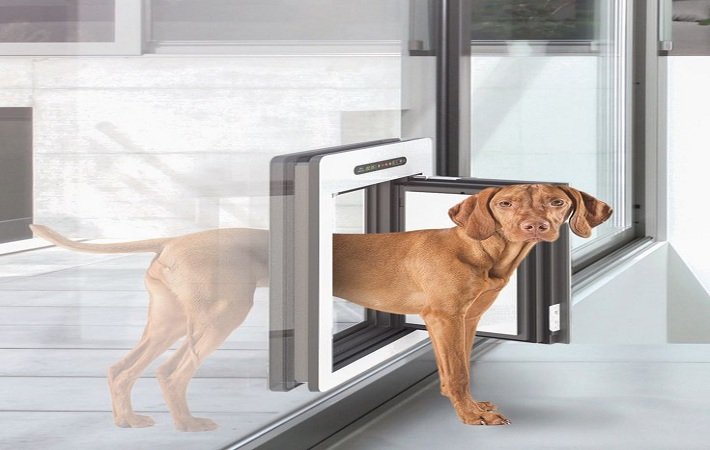
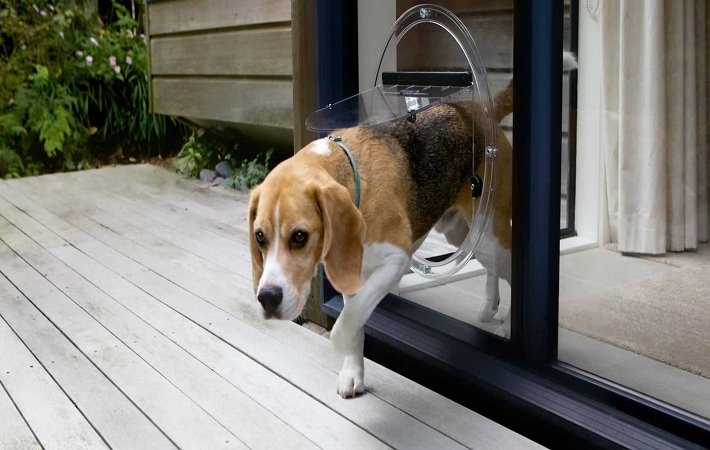
The size of your doggie entryway will rely upon the size of your canine. That implies you’ll need to quantify him. With your canine remaining down on the ground, utilize an estimating tape to measure the separation from the highest point of his back down to the floor. You’ll need to offer him a bit of leeway or two of freedom so he’s not crouching each time he attempts to get in. You’ll additionally leave an inch between the lower part of your doggie entryway and the lower part of your real entryway. Whenever you have the estimations down, follow a rectangular doggie entryway onto your genuine entryway, focused close to the base.
Stage 2: Cut Your Dog Door Into Your People Door
You can take your entryway off its pivots or, in case you’re certain about your cutting aptitudes, leave it erect. Follow the blueprint of your pre-estimated doggie entryway right around dog door.
Stage 3: Sand It Down
To make the entryway alright for your puppy draw out the sander and relax those edges down. Ensure you free the opening of any wood that may be jabbing out, which could represent a danger for your canine. After you’re finished sanding the opening don’t hesitate to paint it to coordinate the remainder of your entryway.
Stage 4: Install the Flap
The fold to your doggie entryway ought to be made of elastic. One frequently recommended material we concur with is the mud fold from a car. Clear it off and paint it on the off chance that you’d like. The floor tangle from a vehicle likewise functions admirably. Any bendable bit of elastic huge enough to cover the opening will do.
Utilizing a solid glue, connect the fold up and over of the opening in the entryway within. It shouldn’t reach past the lower part of the opening or your canine probably won’t have the option to push it the two different ways.
Stage 5: Secure Your Dog Door
While the new canine entryway is extraordinary for permitting your puppy to meander in and out openly while you’re at home, you ought to never leave it unattended when you’re busy working or away from an extended get-away. The opening represents a security danger if not appropriately fixed. You can buy sheet metal that is sufficiently enormous to cover the opening for around $10 at a tool shop.
At the point when you’re not home, make sure to screw the metal plate over your canine way to keep interlopers from utilizing it as a passageway.
It probably won’t be the prettiest arrangement. Anyhow, it will do when absolutely necessary and save you a load of IfetchToo over getting one and have it introduced for you. It’ll additionally shield your canine from intruding on your #1 show when he needs to do his business!